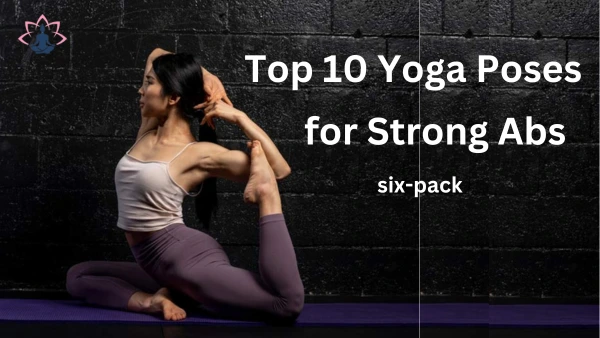
Put an end to the never-ending crunches and sit-ups! Yoga may be the shockingly powerful secret weapon you’ve been ignoring if you want to build a rock-solid core. In addition to promoting flexibility and reducing tension, several yoga poses effectively work your abdominal muscles, giving you the desired six-pack abs. Prepare to unroll your mat and learn ten intense yoga positions that will help you rediscover your inner zen while strengthening your core, increasing your metabolism, and getting closer to the toned stomach of your dreams. Building a stronger, healthier person on the inside and out is the goal here, not just improving your appearance. Let’s get started!
- The Best 10 Yoga Pose for Strong Abs
- 1. Cat Pose Crunches
- 2. Plank Pose
- 3. Vasisthasana (Side Plank)
- 4. Dolphin Plank
- 5. Parivrtta Utkatasana (Revolved Chair Pose)
- 6. Crescent Lunge (Anjaneyasana)
- 7. Ardha Chandrasana (Half Moon Pose)
- 8. Trikonasana (Triangle Pose),
- 9. Paripurna Navasana (Boat Pose)
- 10. Crow Crunches
- Conclusion/Disclaimer
- FAQ
The Best 10 Yoga Pose for Strong Abs
Yoga’s ability to strengthen the core and offer people the much-desired abs is making it more and more popular.
Even while it may seem impossible to achieve a six-pack, practically every yoga pose works the core, so even one yoga session is a powerful workout for your abdominal muscles!
So why not try some of the yoga poses below to achieve your objective if you’re sick of performing endless crunches to gain that six-pack?
1. Cat Pose Crunches
For a mild warm-up, Cat Pose, also known as Marjaryasana, is frequently combined with Cow Pose in yoga. By stretching your wrists, shoulders, and spine, this pose gets you ready for further action. By stimulating the parasympathetic nerve system and inhibiting the stress response, the steady, rhythmic transition between Cat Pose and Cow Pose, timed with your breathing, promotes relaxation. Incorporating mindfulness into Cat Pose can also improve body awareness. The Majaryasana Cat Pose
Step-by-Step Guidelines for Cat Pose
- Place your knees under your hips and your wrists under your shoulders, or slightly forward to adopt cat pose, as you begin on your hands and knees (all fours).
- Press through the fingertips and the base of your fingers after spreading them out.
- Pull your tummy in, raise your side waists, circle your spine, and let your head drop to the floor in cat position as you exhale.
- Feel the stretch in your back as you actively push the floor away.
- After taking a breath, return to your beginning neutral position.
- Usually, to warm up the spine, a few rounds of Cat Cow positions are performed after Cat pose.
Advice for beginners
- Ask a friend to place their hands on your upper back to increase awareness in that area.
- Try beginning the action from your tailbone and working your way up your spine to extend the duration of your head dips. This will allow you to examine the curvature in different parts of your back.
Step-by-Step Guidelines for Crunches
You must incorporate core training into your strength training regimen if you intend to follow one. After all, core training is the only exercise that can effectively increase your stability and balance. The major advantage of this is that you will obtain toned abs. Crunches are among the best core training exercises. Crunches might be the first workout a gym trainer suggests if you ask them what the finest exercises are for getting really toned abs. However, it’s crucial to execute it correctly. You may profit from this exercise to the fullest extent if you do not concentrate on form. Everything that has to do with crunches will be covered in this guide. We’ll go over everything, from variants to a detailed tutorial on how to accomplish it. Since this is a complete beginner’s guide crunches workout, there is no precondition.
How do you perform crunches?
Although this exercise may require some effort to perform, it is quite simple to learn. Here’s how to perform the crunches:
- Place your feet hip-width apart while lying on the mat.
- Place your hands on your chest and lift your legs; most people find that crossed hands are the most comfortable.
- Take a breath now and try to slightly contract your abs.
- Take a deep breath out and raise your head and shoulders off the floor. Your body will move in accordance with the contraction of your abs. Simply maintain a relaxed head and shoulders position.
- Release your body slowly back to the floor when you take another breath.
Benefits of cat pose
- increases mobility by gently massaging the spine.
- Neck and back stretches
- Combining cow pose with an amazing pre-yoga warm-up
- enhances spinal fluid circulation
- strengthens the muscles in the palms and wrists to get them ready for downward dog.
See also: Yoga Asana Types: A Complete Guide
2. Plank Pose
One of the basic yoga poses that can help strengthen and stabilize the arms, legs, and core is the plank. It is a straightforward but difficult pose that calls for appropriate muscular alignment and activation. Gaining proficiency with the plank can help your yoga practice in many ways, regardless of your level of experience. We’ll go over how to perform planks properly and the advantages they can have for your yoga practice in this article. Prepare to perspire and feel your muscles contracting!
Step-by-Step Guidelines for Plank Pose
- Get down on your hands and knees. Using your yoga mat, start on your hands and knees. Spread your fingers widely apart and place your palms on the ground just beneath your shoulders.
- Take a Step Back Put yourself in a high plank position by stepping your feet back one at a time. From head to heels, make sure your body is in a straight line.
- Involve the Core Pull your navel in toward your spine by using your abdominal muscles.
- Hold Your Position Avoid putting your shoulders near your ears. Keep your shoulder blades open on your back rather than squeezing them together. The position of your neck is neutral.
- Hold Your Position Avoid putting your shoulders near your ears. Keep your shoulder blades open on your back rather than squeezing them together. The position of your neck is neutral.
- Hold on Breathe evenly and deeply while you hold the stance for 30 to 60 seconds.
- Release Return to a tabletop position after lowering your knees to the mat to exit the pose. Another option is to lower your knees to the floor and rest in Child’s pose, or push yourself back into Downward Facing Dog.
Benefits of Plank Pose
- Strengthens Core The abdominal, chest, and low back muscles are all toned by Plank Pose.
- Strengthens the Upper Body It fortifies the shoulders, wrists, and arms.
- Enhances Posture Additionally, planking helps to improve posture by strengthening the muscles that surround the spine.
- Boosts Vitality Spending a few minutes in Plank Pose tones the neurological system and increases stamina and endurance.
- Increases Stability and Balance: Planking helps increase stability and balance by requiring the body to keep a straight line from head to heels.
- Mental attention: It requires a lot of positive self-talk and mental attention.
3. Vasisthasana (Side Plank)
One of the most venerated saints, Vasistha, was also one of the Saptarishis, or Seven Seers. He was the primary author of Mandala 7 in the Rigveda. A mother cow named Kamdhenu and her offspring, Nandini, were in Vasistha’s custody. Vasistha became wealthy because this supernatural cow could grant him anything. Thus, the meaning of the word Vasistha—wealthy—was developed.
Step-by-Step Guidelines for Vasisthasana (Side Plank)
- Enter Dandasana, also known as plank posture.
- Swing your left arm and foot on the right while gradually shifting your weight to the right arm and foot.
- Let the left arm rest on the hip and place the left foot on the right foot.
- Instead of being just below the shoulder, the right hand should be somewhat in front of it. Additionally, make sure the arm is not twisted and the palm is firmly planted against the floor.
- With your fingertips pointing toward the ceiling, slowly lift your left arm until it is perpendicular to the floor as you take a breath.
- For a few breaths, look at the fingertips while you swivel your neck to face the elevated arm.
- Bring the arm down to rest on the hip as you release the breath.
- Return to Dandasana slowly and take a few deep breaths to relax.
- On the opposite side, repeat the procedure.
Benefits of Vasisthasana (Side Plank)
- Strengthens The arms, wrists, legs, and abdomen are all strengthened by Vasisthasana.
- Enhances Equilibrium The upper strength and balance of the body are enhanced by this stance.
- Core Engagement The position is a complete workout for general strength and stability because it calls for the use of the shoulders, legs, and core.
- Being mindful Vasisthasana is a symbol of fortitude, equilibrium, and awareness.
4. Dolphin Plank
Dolphin Plank Pose, sometimes referred to as Forearm Plank, is a forearm-based version of the classic plank pose. While relieving wrist strain, this stance offers the advantages of Plank stance. It stretches the hamstrings, calves, and foot arches while strengthening the shoulders, arms, and core. From a philosophical standpoint, it represents the traits of the crocodile (strength, stability, and resilience) and the dolphin (playfulness, joy, and intellect). Additionally, it is thought to awaken the manipura (solar plexus) chakra, which is linked to transformation, self-assurance, and willpower.
Step-by-Step Guidelines for Dolphin Plank
- Start in Adho Mukha Svanasana and gradually move your body weight forward.
- Make sure that your wrists and shoulders line up.
- Lower your arms slowly until your forearms make contact with the ground. Press your palms to the floor.
- Place your heels just over your toes while maintaining a straight posture.
- Maintain a straight back and knees while keeping your eyes fixed on the ground.
- The palms should face one another if at all possible.
- Pull your abdominal muscles in slowly as you inhale, then let them relax as you exhale.
- Before going back to Adho Mukha Svanasana, hold this pose for a few breaths.
Beginners’ Guide to Dolphin Plank Pose (Makara Adho Mukha Svanasana)
This position can be performed by beginners while kneeling. To support the body’s weight, yoga blocks can also be positioned beneath the forehead.
Benefits of Dolphin Plank
- effectively relieves back pain, exhaustion, and headaches
- makes the arms and legs stronger.
- strengthens the muscles of the abdomen
- enhances digestion
- reduces the discomfort of menstruation
5. Parivrtta Utkatasana (Revolved Chair Pose)
A detoxifying pose is the Twisting Chair, also known as Parivrtta Utkatasana. Holding your center in chair position will cause you to twist deeply from the thoracic spine. This position may be difficult because you must maintain hip squaring while using your leg power for stability.
Revolved Chair Pose, or Parivrtta Utkatasana, is a yoga posture known for its detoxifying effects and ability to promote spinal movement. This pose can be challenging, as it requires leg strength for stability while maintaining proper hip alignment.
Step-by-Step Guidelines for Parivrtta Utkatasana (Revolved Chair Pose)
- Put your feet together, big toes touching, and heels slightly apart to start in Tadasana, or mountain pose. Place your feet hip-width apart and align the outside borders of your feet if you have lower back problems.
- Chair Pose (Utkatasana): As though you were seated in a chair, exhale, bend your knees, and drop your hips.
- Raise your chest while maintaining your weight in your heels. With your hands facing one another, extend your arms parallel to the floor.
- Bring Your Hands to Prayer: Place your hands in the middle of your chest in the prayer position.
- Twist to the Right: Start the action from your core by exhaling and twisting your torso to the right. Touch the outside of your right thigh with your left elbow.
- Preserve the alignment of the chair pose: Make sure your hips stay square and maintain the lower portion of your body as it was in the Chair Pose. Draw the right hip back into line with the left if it has shifted forward.
- Increase the Twist: To open your chest further to the right, press your left tricep onto your right outer thigh and both hands together.
- Gaze: If your arms are outstretched, look up at the sky or at your right hand.
Modifications
- Put your feet parallel and hip-width apart if you have tight hips or a tight lower back. After inserting the left elbow into the left knee, twist.
- Low Back Pain: Try to keep your normal lumbar curve while twisting as little as possible.
Benefits of Parivrtta Utkatasana (Revolved Chair Pose)
- Enhances Back Health: Enhances the mid and low back.
- Boosts Spinal Flexibility: This improves the spine’s flexibility.
- Tone and Cleanse: Balances and cleanses the internal organs.
- Enhances Endurance and Balance: Enhances endurance and balance.
See also: Yoga Poses For Flexibility And Strength For Beginners
6. Crescent Lunge (Anjaneyasana)
Anjaneyasana is a challenging pose to master. In terms of alignment and muscular engagement, it can be approached in a variety of ways, has numerous variations, and is known by a number of names (such as Ashva Sanchalanasana or Equestrian Pose). Since there is no one correct technique to do this pose, we will discuss the many approaches and their results.
Step-by-Step Guidelines for Crescent Lunge (Anjaneyasana)
- Begin by assuming the downward-facing dog pose.
- Take a breath, lift your right leg behind you, and then step your right foot forward between your palms.
- Verify that the right ankle is in line with the right knee.
- As you exhale, ground through your feet and draw your lower abdominal muscles in. Then, as you inhale, sweep your arms upward and forth, palms facing each other.
- Lengthen your tailbone toward the floor, bend your back knee slightly, and then extend through your back leg to open and stretch your foot sole.
- Draw your front ribs down into your torso by opening your chest.
- Hold on for five breaths.
- As you release the breath, place your hands on the ground beside your right foot.
- Return to the Downward Facing Dog position with your right foot.
- With the left foot forward, repeat.
Beginners’ tips Crescent Lunge (Anjaneyasana)
- It’s quite normal to have trouble stepping the foot forward between your hands, so don’t panic! If you need assistance stepping into Lunge from Downward Dog, see yoga sikheadvice.
- Another way to start the pose is to stand at the rear of your mat and take a single step forward.
Benefits of Crescent Lunge (Anjaneyasana)
aids in improving foot and hip flexor mobility.
makes the legs stronger.
enhances stability and balance.
Enhances Stability and Strength: enhances stability and balance while strengthening the hips, legs, and core.
Stretches Muscles: Encourages flexibility and mobility by stretching the hip flexors, groin, and legs.
Enhances Posture: By lessening body part stiffness, it aids in enhancing and stabilizing posture.
7. Ardha Chandrasana (Half Moon Pose)
Half Moon Pose, or Ardha Chandrasana, is a Hatha yoga pose that has numerous health advantages. The Sanskrit form of the word Ardha Chandrasana means “Half Moon Pose,” where “ardha” means half, “candra” means moon, and “asana” means stance. It is a popular peak pose that many yoga practitioners may achieve. Chandra Namaskar, or Moon Salutation, is when it is practiced.
Step-by-Step Guidelines for Ardha Chandrasana (Half Moon Pose)
- Start with your right leg back in the horse-riding pose, Ashwa Sanchalanasana.
- Elevate your hands onto your hips and find equilibrium between your front and rear legs.
- Raise your arms, palms facing each other, once you are in a secure position.
- As you take your next breath, lean your head back slightly and look up at the ceiling. Arch back from your thoracic spine.
- From your foot to your fingers, arch back as far as it feels comfortable to form a half moon.
- Hold for a short while, then slowly release.
- With the left leg back, counter-position in child pose (balasana) and repeat.
Benefits of Ardha Chandrasana (Half Moon Pose)
- The entire skeletal structure is stretched.
- provides the shoulders, neck, back, and chest with a wonderful stretch.
- encourages a healthy neurological system and spine.
- A good stretch for the body.
- increases the spine’s flexibility.
- makes your legs stronger.
- strengthening the muscles in the core.
- enhances equilibrium in the body.
- renewal of cells.
- Boost your resolve, focus, and concentration.
- relieves constipation.
- enhances cardiovascular well-being.
- boosts estrogen and female vigor.
- beneficial when attempting to conceive.
- lessens kyphosis.
- lessens anxiousness.
- opens the chakra of the heart.
- raises Kapha, which promotes greater grounding, stability, and serenity.
- enhances the brain’s blood supply.
- Develop your creativity, empathy, and compassion.
- Boost core stability, balance, and concentration.
8. Trikonasana (Triangle Pose),
Triangle Pose, also known as Trikonasana, is a basic yoga pose that symbolizes balance and strength. In this pose, the arms are spread wide and the body forms a triangle, grounding via one foot. It promotes flexibility in the legs, hips, and spine by working several muscle groups. Beyond the physical benefits, trikonasana promotes stability and mental focus. It increases lung capacity and facilitates deeper breathing by opening the chest. This pose is well known for promoting better digestion and reducing stress. By accepting Trikonasana, you set out on a path of balance, bringing your body, mind, and soul into harmony with this enlightening yoga pose.
Step-by-Step Guidelines for Trikonasana (Triangle Pose)
- Take a straight stance. Make sure your feet are at least 31/2 to 4 feet apart.
- Rotate your left foot 15 degrees inward and your right foot 90 degrees outward.
- Now, line up the middle of your left foot’s arch with the middle of your right heel.
- Make sure your feet are planted firmly on the ground and that your body weight is distributed evenly across both feet.
- After taking a deep breath, bend your body to the right, lowering it from the hips while maintaining a straight waist. This will allow your left hand to rise into the air while your right hand descends toward the floor. Maintain a straight line with both arms.
- Without causing any distortion to the sides of your waist, place your right hand on your shin, ankle, or the floor outside your right foot. Line up the tops of your shoulders with your left arm as you extend it toward the sky. Maintain a neutral head posture or tilt it to the left while gently staring at the left palm.
- Make sure your body is bending sideways rather than forward or backward. The chest and pelvis are exposed.
- Be steady and stretch as much as you can. Continue inhaling deeply and slowly. Continue to relax your body with each exhale. Simply focus on your breathing and your body.
- Come up, lower your arms to your sides, and straighten your feet as you take a breath.
- On the opposite side, repeat the same.
Benefits of Trikonasana (Triangle Pose)
- Increases Flexibility: Increases overall flexibility by stretching the hips, groins, and hamstrings.
- Builds Muscle: Builds muscle in the arms, chest, knees, ankles, and legs.
- Improves Digestion: By stimulating the stomach organs, the twisting motion helps to improve digestion and lessen bloating.
- Enhances Stability and equilibrium: Promotes stability by enhancing mental clarity and physical equilibrium.
- Lessens Stress: Aids in the release of mental and physical tension, which lessens worry and stress.
- Stimulates Vital Organs: Improves the function of vital organs including the kidneys and liver by massaging and stimulating them.
- opens up your shoulders and chest.
- strengthens the muscles in your neck, back, legs, and abdomen.
- facilitating digestion.
- beneficial for anxiety and stress.
- eases back pain, particularly in expectant mothers.
9. Paripurna Navasana (Boat Pose)
It improves the abdominal muscles and develops a sense of balance, making it one of the so-called Boat Poses. Your entire body is raised off the ground, shifting your center of gravity to your pelvis. Your hands extend past the knees while remaining shoulder-height and parallel to the floor, activating and strengthening your arms.
Step-by-Step Guidelines for Paripurna Navasana (Boat Pose)
- Bend your knees and put your feet on the ground. As you inhale, place your hands behind your knees and raise your chest, using your back muscles.
- Pull your lower abdomen up and in by using your inner thighs.
- Raise your feet to knee height, toes spread, and lean back on the back of your sitting bones.
- Ensure that your arms are parallel to the floor.
- Stretch your legs to go farther.
- Work up to ten breaths while staying for two to five.
- To exit the posture, lower your feet on an exhale, sit with your back straight, and hold onto your legs for a few breaths.
Benefits of Paripurna Navasana (Boat Pose)
- Enhances Core Muscles: Paripurna Navasana enhances the strength of the hip flexors, abdominal muscles, and spine. Additionally, it strengthens the core as a whole.
- Hamstring Stretches: This pose increases lower body flexibility by stretching the hamstring muscles.
- Enhances Digestion: By giving the stomach organs a nice massage, it enhances metabolism and digestion. Additionally, it fortifies the digestive tract.
- Glands Stimulated: Paripurna Navasana stimulates the thyroid, prostate, intestines, and kidneys.
- Reproductive System Tone: This pose gives the reproductive system tonicity and strength. Additionally, it enhances sexual functions and sexual organs.
- It is well renowned for being an effective stress reliever. The asana reduces tension and enhances focus by harmonizing Prana Vayu.
10. Crow Crunches
Bakasana, or modified crow posture, is a well-liked yoga practice with numerous physical and mental health advantages. One of the most popular arm balances is crow pose. Gaining proficiency in it can improve your focus, strength, and balance. If you don’t have the strength to maintain the stance, it can be difficult. Even if you are not yet strong enough to perform the posture, there are methods to change it so you can still execute it. Let’s examine how to accomplish the modified crow stance, offering useful hints and variations as we go. As we explore the realm of modified crow position, get ready to take your yoga practice to new heights.
Step-by-Step Guidelines for Crow Crunches
- On a sturdy surface, start by resting on your back.
- Just above your knees, rest your elbows on your thighs.
- Raise the tailbone off the ground.
- Crow crunches can also be performed on a tabletop in reverse. In this variant:
- With your shins parallel to the floor, lie on your back in a reverse tabletop position.
- Press your elbows against your knees by raising your head and chest.
- Crunch in after slowly extending your arms and legs.
- Extend one leg at a time, switching from right to left, to do alternating crow crunches.
Benefits of Crow Crunches
- strengthens the core and upper body. Crow crunches improve core and upper body strength.
- Getting ready for the Crow Pose You may get ready for Crow Pose (Kakasana) by performing Crow Crunches. They aid in developing the hand strength required for balance.
- enhances equilibrium Improved balance may result from this workout.
- encourages lightness Crow crunches have the ability to make the body feel lighter.
Conclusion/Disclaimer
It’s crucial to speak with a healthcare provider before beginning any new fitness regimen, even though yoga can be a fantastic way to strengthen your core and increase your general level of fitness. To prevent injury, make sure you’re performing yoga poses correctly and pay attention to your body. Professional medical advice should never be replaced by the information presented here.
FAQ
How does yoga help in building strong abs?
Q: How does yoga help in building strong abs?
Yoga strengthens muscles and is particularly effective for building core stability and developing strong abs because core engagement is present in almost every yoga posture and transition.
Are there specific yoga poses that target the abs more effectively?
Q: Are there specific yoga poses that target the abs more effectively?
Yes, certain poses like side plank, triangle pose, boat pose, and revolved crescent lunge are especially effective for building a strong core.
Can beginners do these yoga poses for abs?
Q: Can beginners do these yoga poses for abs?
Yes, most of these poses can be modified to suit different fitness levels. For example, boat pose can be modified by keeping your feet on the floor with your legs bent.
How often should I practice these yoga poses to see results?
Q: How often should I practice these yoga poses to see results?
While there is no specific recommendation given in the search results, consistent practice is generally recommended to see results.
What are the benefits of a strong core?
Q: What are the benefits of a strong core?
A strong core helps improve balance, prevent injury, and support overall fitness