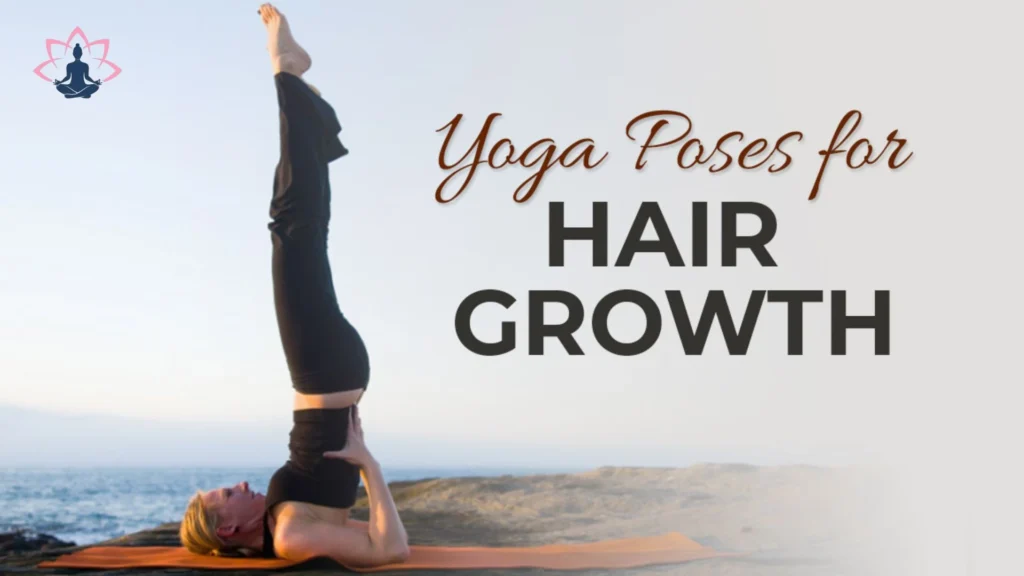
Hair loss and thinning are common concerns, often stemming from stress, poor diet, hormonal imbalances, and environmental factors. While many seek expensive treatments, yoga offers a natural and holistic approach to stimulate hair growth. Yoga poses enhance blood flow to the scalp, lower stress levels, and balance hormones, all of which promote healthy hair development. A comprehensive remedy that improves general health, including hair, can be obtained by including yoga into your regimen.
- The Connection Between Yoga and Hair Growth
- Benefits of Regular Yoga Practice for Hair Growth
- Top 10 Yoga For Hair Growth
- Adho Mukha Svanasana (Downward-Facing Dog)
- Uttanasana (Standing Forward Bend)
- Sarvangasana (Shoulder Stand)
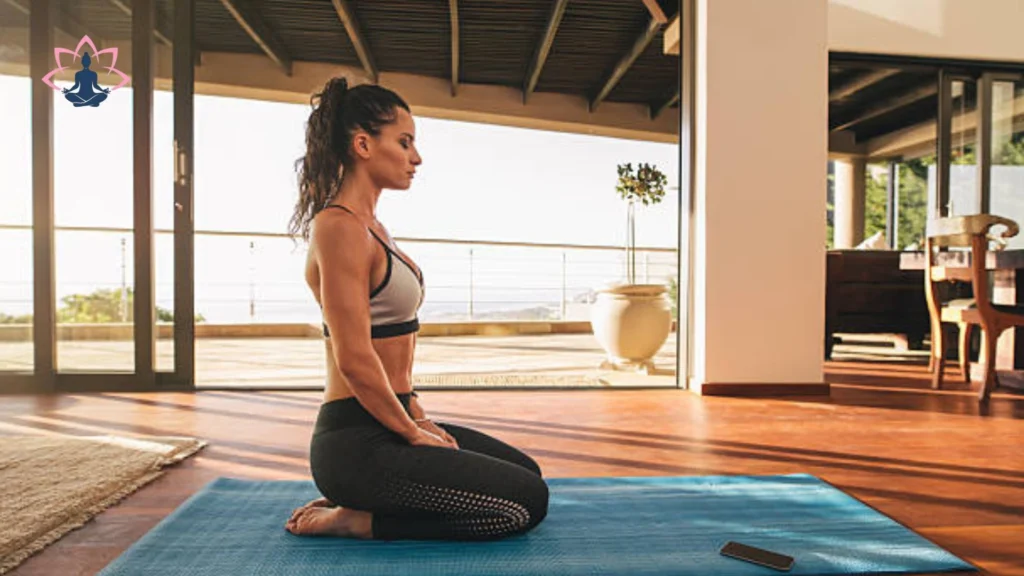
- Vajrasana (Diamond Pose)
- Step-by-Step Guidelines for Vajrasana (Diamond Pose)
- Kapalabhati Pranayama (Skull Shining Breathing Technique)
- Ustrasana (Camel Pose)
- Balayam Yoga (Rubbing Nails)
- Apanasana (Knee to Chest Pose)
- Pavanmuktasana (Wind Relieving Pose)
- Sirsasana (Headstand)
- Additional Tips for Enhanced Yoga for Hair Growth
- Conclusion
- Disclaimer
- FAQs
The Connection Between Yoga and Hair Growth
Yoga increases circulation, which guarantees that hair follicles get the oxygen and nutrients they need to grow. Regular practice can detoxify the body and reduce oxidative stress, vital for maintaining strong and healthy hair. Yoga’s ability to reduce stress can help prevent stress-induced hair loss and encourage a more robust growth cycle.
Regular practice of yoga along with a specific diet rich in vitamins like biotin and omega-3 fatty acids can amazingly improve the condition of hair texture and volume. Despite the fact that yoga is not one of those single-handed hair loss treatments for severe hair problems, it is an incredibly effective complementary process to support the natural strength and health of hair.
People who want to stop hair loss and promote hair growth naturally should consider enrolling in a yoga and Ayurveda program in Kerala. This program provides in-depth knowledge and practical techniques. Here are some of the best yoga asanas for hair growth to stop hair loss and aid hair regrowth:
Benefits of Regular Yoga Practice for Hair Growth
Yoga offers remarkable benefits for hair growth, extending beyond traditional hair care methods. It provides a holistic approach to maintaining healthy, vibrant hair. This is achieved by addressing both physical and mental wellness.
The benefits of yoga for hair are multifaceted, targeting the root causes of hair loss. It does so through improving overall health. Stress reduction is a key mechanism by which yoga supports hair health.
- Reduces cortisol levels that contribute to hair fall
- Improves overall blood circulation to the scalp
- Balances hormonal systems
- Enhances nutrient delivery to hair follicles
Regular yoga practice stimulates blood flow to the scalp, essential for hair growth. The increased oxygen and nutrient supply revitalize hair follicles. This can slow down hair fall and promote stronger, healthier hair growth.
| Yoga Benefit | Impact on Hair Health |
|---|---|
| Stress Reduction | Minimizes stress-induced hair loss |
| Blood Circulation | Improves nutrient delivery to scalp |
| Hormonal Balance | Regulates hair growth cycles |
| Mental Wellness | Reduces anxiety-related hair fall |
Practitioners who consistently integrate yoga into their wellness routine often report significant improvements. They notice better hair texture, strength, and overall scalp health. The mind-body connection established through yoga creates a powerful environment for natural hair restoration.
Top 10 Yoga For Hair Growth
These days, does your hairbrush seem a bit full? Are you fed up with fighting thinning hair and dull locks? The solution to fuller, healthier hair may be closer than you think—it might be on your yoga mat! Despite the claims of innumerable products, Learn how adding certain yoga asanas for hair growth to your practice can help your hair reach its maximum potential, enhance hair growth, and lower stress levels.
Adho Mukha Svanasana (Downward-Facing Dog)
The term Adhomukha Svanasana comes from Sanskrit. Adho means downward, mukha means facing and svana means dog. Adhomukha Svanasana is also known as Down Dog. Often Adhomukha Svanasana is seen as the same as Parvatasana or Mountain Pose, but it is not! Today we will discuss with you the step-by-step instructions, benefits and precautions of this yoga pose.
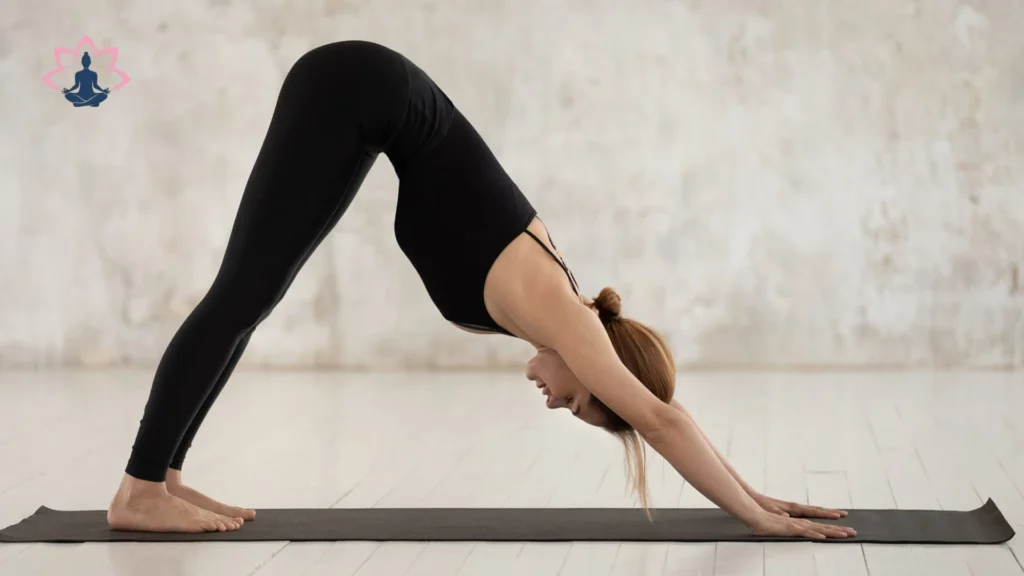
Step-by-Step Guidelines for Downward Facing Dog, or Adhomukha Svanasana:
- Stand in Tadasana and place your feet close together
- Inhale and raise your arms up
- Exhale and bend forward
- Place your hands beside your feet and jump backward
- Keep your feet hip-width apart
- Straighten your arms and legs
- Keep your heels on the floor
- Keep your spine straight
- You should have a straight neck, head, and spine.
Note: Do not bend your back! In Adho Mukha Svanasana the legs are wide apart and the back is always straight. Do not confuse Parvatasana.
Benefits of Adho Mukha Svanasana:
- Strengthens the legs, arms and back
- Improves flexibility of the hamstrings and calf muscles
- Increases strength in the neck and shoulders
- Improves blood circulation in the legs
Uttanasana (Standing Forward Bend)
Standing Forward Bend – Uttanasana (oot-an-a-sun-a) – is a pose that stretches the entire body and can be adjusted to increase or decrease the level of intensity in the hamstrings. The name of this yoga pose is derived from the Sanskrit words, ut, which means intensity, tan, which means to stretch or extend, and asana, which means pose
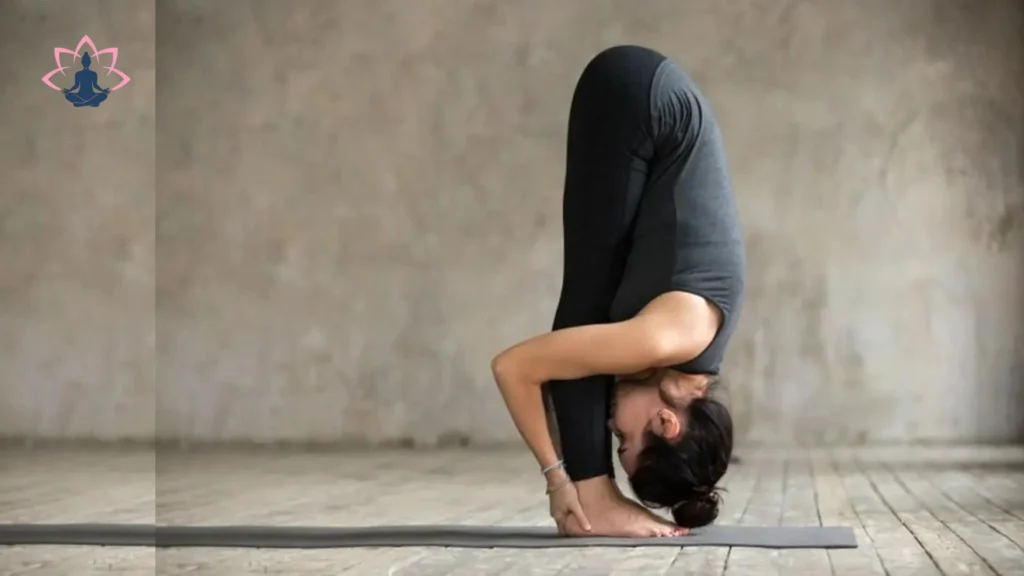
Step-by-Step Guidelines for Uttanasana (Standing Forward Bend)
- Begin with balancing your weight equally on both feet while standing in Tadasana.
- Inhale, extend your arms overhead.
- Exhale, bend forward and lower your arms down toward your feet, keeping your back straight.
- Stay in this pose for 20-30 seconds and continue breathing deeply.
- Keep your legs and spine straight and rest your hands either on the floor, beside your feet, or on your legs.
- Exhale, move your chest toward your knees and lift your hips and tailbone up.
- Relax your head and move it slowly toward your feet. Keep breathing deeply.
- Inhale, stretch your arms forward and upward and slowly come to a standing position.
- Exhale, bring the arms to the side.
Benefits of Uttanasana:
- Stretches the muscles of the back of the body
- Activates the nervous system by improving blood circulation
- Increases blood flow to the brain
- Stretches the hamstrings
- Tones the abdominal organs
Sarvangasana (Shoulder Stand)
In the yoga position known as Sarvangasana, or shoulder stand, the entire body is balanced on the shoulders. Sarv means “all,” “anga” means “part of a body,” and “asana” means “posture.” As the name suggests, Sarvangasana affects how every bodily part works. Known as the “Queen of asanas,” this pose is very good for preserving both physical and mental well-being.
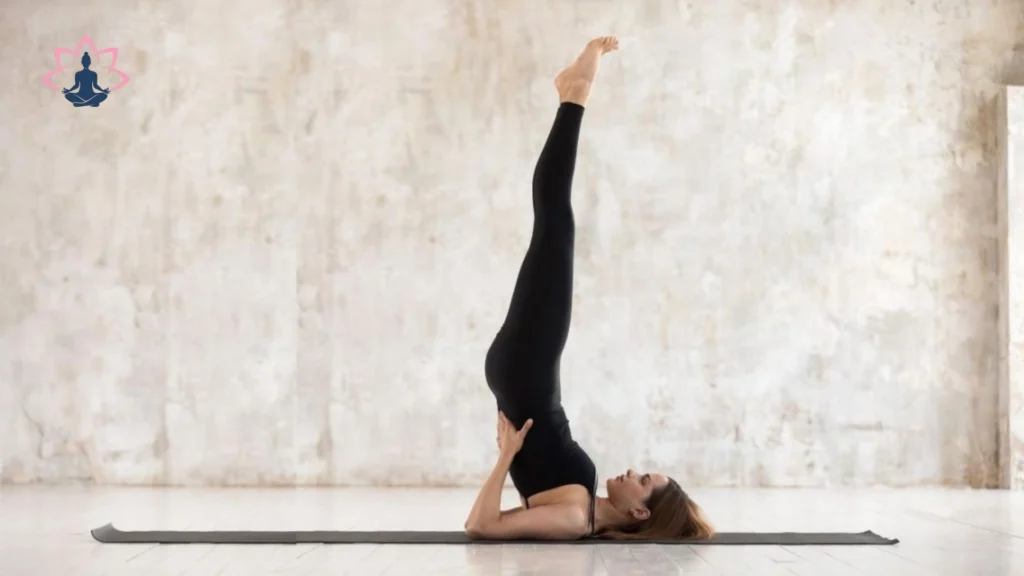
Step-by-Step Guidelines for Sarvangasana (Shoulder Stand)
- On a yoga mat, lie flat on your back.
- Next to your body, place your arms palms down.
- Take a breath out and raise your lower back, hips, and legs off the mat.
- Place your hands as close to your shoulder blades as you can to support your lower back.
- To get your torso, hips, and legs perpendicular to the floor, raise them.
- Tuck your chin toward your chest and keep your elbows shoulder-width apart.
- Breathe steadily while you hold the stance for 30 to 5 minutes.
- Slowly return your legs, vertebra by vertebra, to the mat to relax.
Benefits of Sarvangasana:
- normalizes the activities of the parathyroid and thyroid glands by stimulating them.
- maintains the spine’s flexibility while strengthening the arms and shoulders.
- increases blood flow to the brain to nourish it.
- increases the amount of venous blood returned to the heart, which stretches the heart’s muscles.
- relieves varicose veins, indigestion, and constipation.
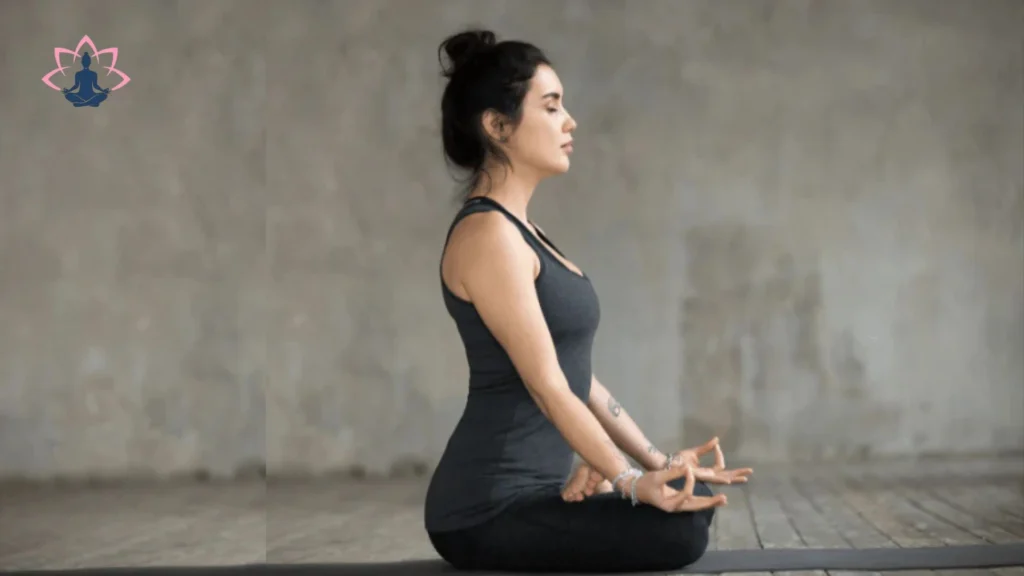
Vajrasana (Diamond Pose)
Vajrasana is one of the many beneficial yoga positions that provide a variety of benefits for your physical and mental well-being, though. Numerous simple, achievable, and practical poses, such as Vajrasana, are included. Information about the Vajrasana pose‘s significance and application is frequently ambiguous. From a spiritual perspective, Vajrasana is a stance that can teach you patience, humility, and tranquility. It’s a whole different story physically. This blog post will go over the advantages, contraindications, and method of Vajrasana. Now let’s get started!
Step-by-Step Guidelines for Vajrasana (Diamond Pose)
- Kneel on the floor to begin. For comfort, think about utilizing a yoga mat.
- Align your feet with your legs and bring your knees and ankles together. Your big toes should connect and the bottoms of your feet should be facing up.
- Sit back on your legs and exhale. Your thighs will rest on your calves and your buttocks on your heels.
- Place your hands on your thighs, then move your pelvis forward and backward until it feels comfortable.
- As you straighten your spine and sit up straight, take calm, deep breaths in and out. Pull your body up with your head, then push your tailbone down toward the floor.
- With your chin parallel to the floor, raise your head so that it faces forward. With your arms relaxed, place your hands palms down on your thighs.
Benefits of Vajrasana
- Lower Back Pain Relief
- Improved Blood Circulation
- Regulates Digestive System
- Knee and Ankle Joint Flexibility
- Strengthen Pelvic Muscles
- Weight Loss
Kapalabhati Pranayama (Skull Shining Breathing Technique)
One kind of pranayama that involves a quick exhalation is called kapalbhati.”Kapal,” which means “skull,” and “Bhati,” which means “shine,” are combined to form Kapalbhati. Numerous illnesses can be cured by the quick exhalation technique used during Kapalbhati. Additionally, the most popular method for internal cleansing and physical detoxification is Kapalbhati Pranayama. Additionally, consistent Kapalbhati exercise keeps the body’s organs functioning properly. Regularly performing Kapalbhati is supposed to improve facial radiance and calm the mind. Do you have any questions? obtain a response from the Rishikesh yoga school.
Step-by-Step Guidelines for Kapalabhati Pranayama (Skull Shining Breathing Technique)
- Maintain a straight spine as you sit back. Position yourself on your knees with your back to the sky.
- Inhale deeply and for a long time.
- Pull your stomach inward as you exhale. Make sure to draw your stomach until it meets your spine. Take as many action as you can. Placing your hand on your stomach will allow you to feel the contraction of your abdominal muscles. Pull the navel in.
- The breath instantly enters your lungs as soon as you relax the muscles in your stomach.
- Exhale for 20 breaths to finish one Kapalbhati Pranayama sequence (round).
- Close your eyes and unwind after a round. Experience the thrill that pranayama brings to your body.
- Perform two additional Kapalabhati Pranayama rounds.
Benefits of Kapalabhati Pranayama
- The practice of Kapalbhati Pranayama aids in the body’s detoxification and enhances blood flow.
- It speeds up the metabolism and aids in weight loss.
- Pranayama Kapalbhati enhances the body’s ability to absorb nutrients and digest food.
- Patients with diabetes benefit greatly from the activation of the abdominal muscles that this pranayama produces.
- It improves blood flow and makes the face more radiant.
- The respiratory system is kept healthy with regular Kapalbhati practice.
- It stimulates the tantric system and brain.
- The practice of Kapalbhati Pranayama helps people relax and let go of tension and worry.
Ustrasana (Camel Pose)
“Asana” denotes posture, while “ustra” means “camel.” Camel Pose is a healthy and invigorating backbend that opens the chest. Unlike chakrasana, it permits a spine extension without requiring you to use your arm to support your body weight. The wheel pose is a backbend, full body stretch that calls for greater willpower and endurance. In contrast, the camel posture allows you more flexibility with your backbends and is a little less strenuous.
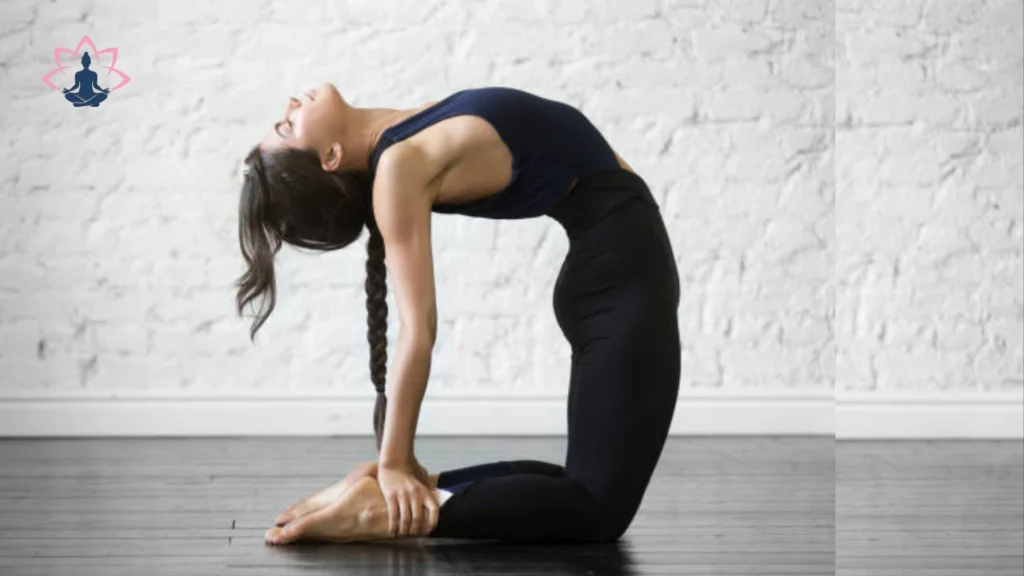
Step-by-Step Guidelines for Ustrasana (Camel Pose)
- Put your hands on your hips while kneeling on the yoga mat.
- The soles of your feet should face the ceiling, and your knees should be parallel to your shoulders.
- Pull your tailbone toward your pubis as though it were being dragged from your navel as you inhale.
- At the same time, move your hands over your feet until your arms are straight and arch your back.
- Avoid flexing or straining your neck and maintain a neutral posture.
- Hold this position for a few breaths.
- Exhale, then slowly return to the starting position. As you stand up straight, pull your hands back to your hips.
Benefits of Ustrasana (Camel Pose)
- enhances digestion.
- expands and stretches the body’s front. Additionally, it fortifies the shoulders and back.
- relieves lower back pain in the body.
- increases the spine’s flexibility and enhances posture.
- reduces the discomfort associated with menstruation.
Balayam Yoga (Rubbing Nails)
Rub your nails firmly against one another while curling your fingers inward. Balayam yoga is a straightforward but powerful method that is thought to promote hair growth by boosting blood flow to the scalp. Rubbing the nails together stimulates the acupressure points on the nails, which are thought to have a direct connection to the hair follicles and encourage stronger hair development.
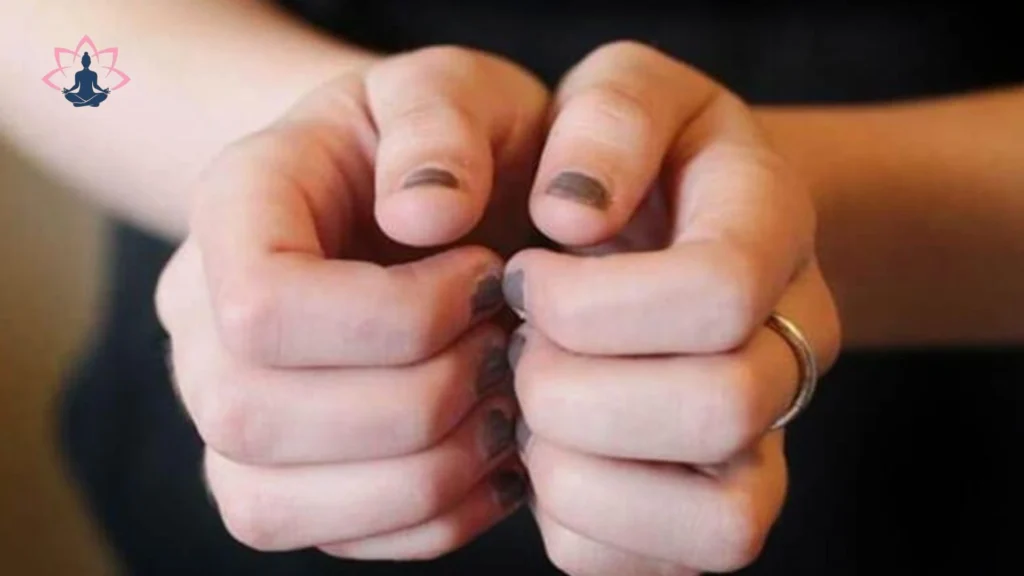
Step-by-Step Guidelines for Balayam Yoga (Rubbing Nails)
- Find a comfy seat and calm your mind with deep breaths.
- Face your palms toward each other, touching your fingernails.
- Gently press your thumbs on your fingers, rubbing your nails.
- Rub your nails for 5-10 minutes.
- Relax your mind and body, letting this calming exercise soothe you.
Benefits of Balayam Yoga (Rubbing Nails)
- enhances the quality of hair, making it stronger and thicker.
- Promotes hair growth
- Enhances hair density
- Treats hereditary hair related problems
- Prevents dandruff and flaky scalp
- Inhibit greying of hair
- Makes your hair black
Apanasana (Knee to Chest Pose)
Apanasana is a fundamental pose that is done while lying down. It is frequently done at the conclusion of back-stretching poses. But it’s not only about soothing the body; it has many other advantages.
Simply lay on your back and squeeze your legs till they reach your chest. With the arms wrapped over the shins, press the spine down against the ground. It’s really as easy as it appears.
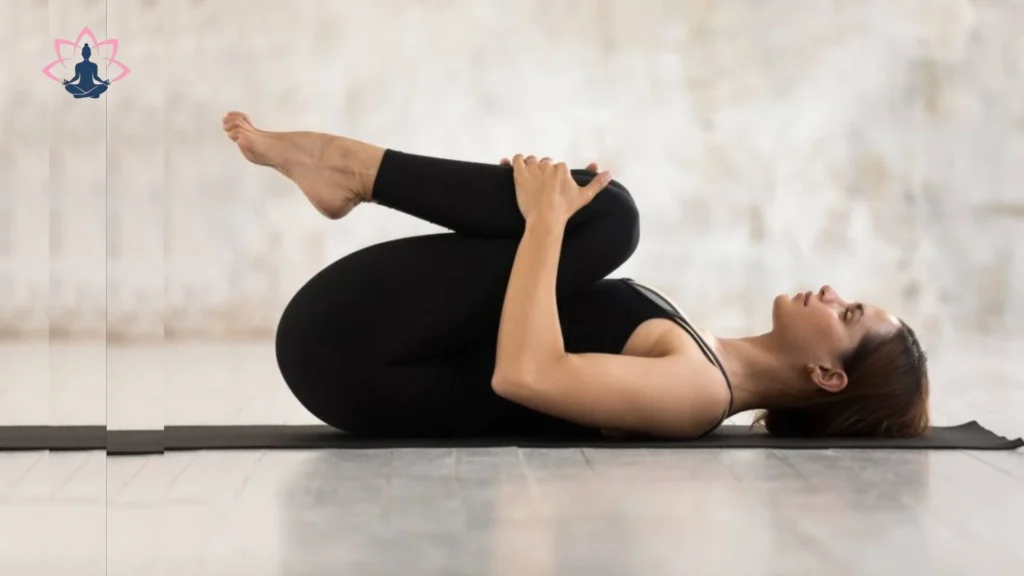
Step-by-Step Guidelines for Apanasana (Knee to Chest Pose)
- Place your feet on the floor while lying on your back and bending your knees.
- Take a breath, raise your feet off the ground, and pull your knees in toward your body.
- Encircle the shins with your hands or forearms.
- Squeeze your knees till they are firmly against your chest after exhaling.
- Tuck your chin into your chest while maintaining a relaxed neck and shoulders.
- As long as it seems comfortable, hold the stance for a few minutes.
- Release your arms and legs as you exhale.
- Stretch your arms and legs out on the ground.
- After a minute of relaxation, perform the pose at least six times.
Benefits of Apanasana (Knee to Chest Pose)
- Strengthens the back
- Massages the abdominal organs
- Improves blood circulation
- Revitalizes the reproductive organs
Pavanmuktasana (Wind Relieving Pose)
A popular reclining pose that aids in the discharge of trapped gas from the colon is pavanamuktasana. Other names for it are wind-liberating pose and wind-relieving pose. The distinctive feature of this pose is that it is suitable for both novice and experienced yoga practitioners. In addition to helping with constipation and flatulence, practicing Pavanamuktasana can assist remove stubborn fat deposits in the pelvic and abdominal regions.
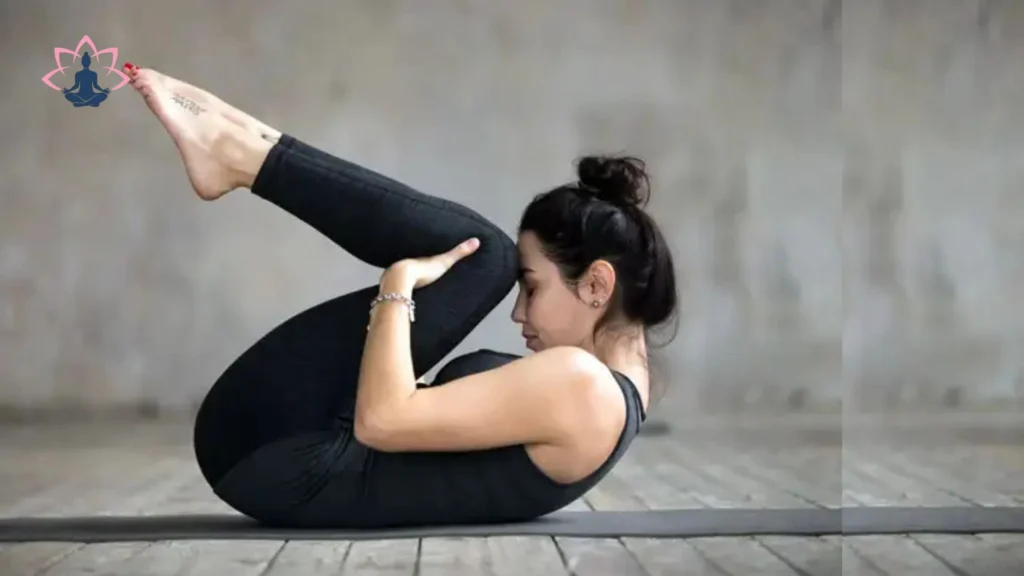
Step-by-Step Guidelines for Pavanmuktasana (Wind Relieving Pose)
- On your back, lie flat. Maintain a close distance between your feet and legs.
- Take steady breaths. Breathe out. Get your legs up off the ground.
- Bend your legs at the knees and raise them. Make sure your legs remain close to one another.
- Grab the areas of your legs just below the knees with your hands.
- Reposition your knees in relation to your head.
- Move your head forward until your forehead reaches your knees after raising it off the ground.
- Hold the position for a few seconds while taking even breaths.
- To unwind, slowly spread your legs and rest your head on the ground.
Benefits of Pavanmuktasana (Wind Relieving Pose)
- Helps to stretch the back and neck.
- The internal organs are squeezed and the abdominal muscles are strained, which improves blood circulation and nerve stimulation, both of which boost internal organ efficiency.
- Any trapped gasses in the large intestine are released by the pressure on the abdomen.
- All internal organs experience an increase in blood circulation.
- The digestive system is better.
- gets rid of constipation.
- loosens the spinal vertebrae and strengthens the muscles in the lower back.
- Impotence and sterility.
Benefits for Women
- Helps with menstruation issues and massages the reproductive organs and pelvic muscles.
- Decreases fat in the thighs, buttocks, and abdomen.
Sirsasana (Headstand)
What makes Yoga a one-of-its-kind physical practice is that it offers place for everyone. Whether you are a novice or an established practitioner, there are hundreds of positions you can do. “Sirsasana,” or headstand, is regarded by many practitioners as one of the most difficult asanas (poses). Why not? It’s a challenging position that calls for strong arms and shoulders, a flexible spine, and incredible upper body strength. It can cause serious injury if done incorrectly. Therefore, we have broken down the entire workout into smaller sections if you would like to try this challenging but beneficial stance.
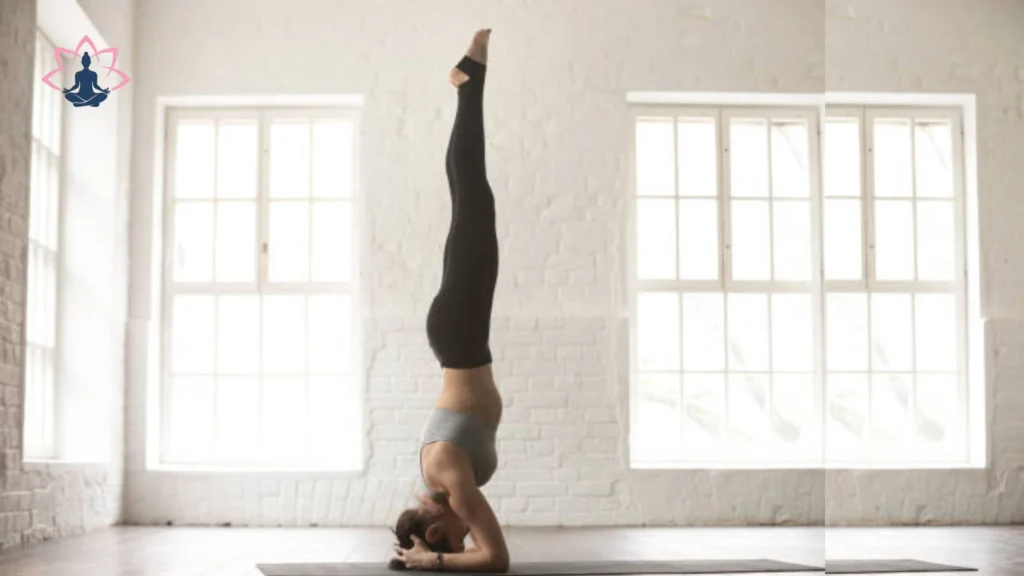
Step-by-Step Guidelines for Sirsasana (Headstand)
- Your yoga mat should be placed near a wall.
- Place your knees behind your hips and your palms beneath your shoulders to begin in the tabletop pose, or all fours.
- Make sure your elbows are below your shoulders by lowering your forearms.
- Next, make an inverted V with the fingers of both palms clasped together.
- We now start to transition into the headstand position. Bring your head close to your palms that are clasped together.
- Then, like in the downward-facing dog stance, straighten both legs.
- Begin walking in the direction of your head.
- There will come a time when your feet will stop moving forward and begin to lift off your chest.
- Raise one leg first, then the other.
Next, straighten one leg and then another.
Benefits of Sirsasana (Headstand)
Let’s first discuss the advantages of performing Sirsasana, or headstand pose, before moving on to the detailed instructions. According to the “Art of Living” mission of spiritual leader Sri Sri Ravi Shankar:
- Sirsana strengthens the neck, shoulders, arms, spine, and tummy.
- It enhances the scalp’s blood flow.
- Headaches may be lessened by it.
- promotes relaxation, which aids in stress reduction.
As a result, this stance has mental and physical health benefits.
Additional Tips for Enhanced Yoga for Hair Growth
- Consistency is key: Regular practice of these asanas is essential to see noticeable results.
- Combine with a healthy lifestyle: A balanced diet, sufficient hydration, and stress management techniques complement the benefits of yoga.
- Listen to your body: Avoid pushing yourself too hard, especially with inversions like Sirsasana and Sarvangasana.
- Consider professional guidance: Consulting a yoga instructor can help you learn the correct techniques and modifications for your body.
Conclusion
Yoga improves circulation, lowers stress, and balances hormones, making it a natural and efficient method of getting lustrous hair. In addition to promoting strong, thick, and lustrous hair, regular practice of these yoga positions can dramatically minimize hair loss when paired with a healthy diet and way of life. Include yoga in your regimen to experience the natural benefits of long-lasting hair health!
Disclaimer
This page’s content is general and is solely provided for educational and clarifying purposes. It is subject to revision and is based on a number of secondary online sources. Before making any connected decisions, please get the advice of an expert.
FAQs
Do I need to practise these asanas daily for hair growth?
Do I need to practise these asanas daily for hair growth?
Yes, consistency is key. Daily practice can enhance the benefits for both hair growth and overall health.
What other lifestyle changes can support hair growth?
What other lifestyle changes can support hair growth?
A balanced diet, adequate water intake, and reducing stress through mindfulness or meditation can complement your yoga practice.
Is it safe for beginners to try these asanas?
Is it safe for beginners to try these asanas?
Yes, but always start under guidance if you are new to yoga to avoid any injuries.
Can yoga really prevent hair loss?
Can yoga really prevent hair loss?
While yoga helps reduce factors that lead to hair loss, it’s essential to consult with healthcare providers for underlying conditions.
How long does it take to see results from hair growth asanas?
How long does it take to see results from hair growth asanas?
Results vary, but with consistent practice, improvements can often be seen within a few months.